
CNC milling jewelry begins by defining your goal. Are you making a wax pattern, a mold part, or a finished metal item? Scoping the workflow at the start is key. Jewelry includes tiny details, shiny surfaces, and must handle wear—all in a small piece. When you know your goal, you can avoid toolpaths that look good in CAD but fail during casting, setting, or polishing.
Jewelry milling choices rely on the size and access of each feature, not only the overall part size. For example, a ring gallery, a pavé setting, and an engraving line often use different CNC Milling Cutting Tools and need different finishing plans. Decide what should be perfectly machined and what can be smoothed by hand after casting.
Machines can’t replace bench skills, but they let you use those skills better. You can use CNC to ensure symmetry, even spacing, and repeatable design every time. Leave a little material for hand finishing where it makes a real difference. This plan makes the process faster and still keeps the jewelry unique.
Good jewelry projects need clear facts—not just sketches. Ask for exact stone sizes, ring measurements, planned finish, and any design details that must stay unchanged. Turn those facts into checked steps and a detailed quote before starting.
Where CNC Milling Fits In?
CNC milling is used for three jewelry tasks: making wax patterns for casting, making reusable molds, or producing finished metal pieces. Always decide the outcome early. Scrap risk, finishing needs, and expectations all depend on what you plan to deliver. Match your process to the end goal for the best result.
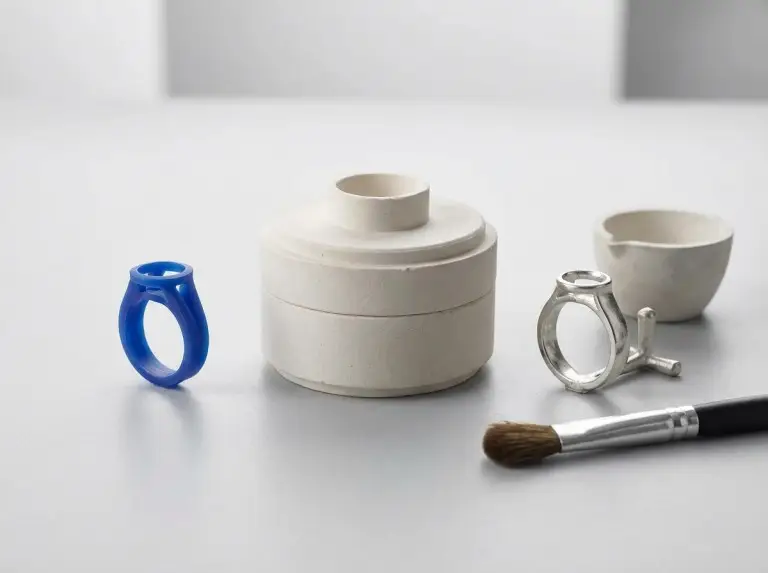
Master Patterns for Casting
Wax pattern milling is an easy entry point for CNC jewelry work. Machined wax patterns hold edges and details well, reducing cleanup after casting. Protect fragile modes by adding support tabs and handling zones on hidden faces.
Making a mold from wax moves risk away from expensive materials and focuses on pattern strength. Thin galleries and sharp changes can crack. Always check minimum wall thickness with a test piece when you’re working with thin details.
Casting follows a chain: start with the wax or resin pattern, then create the mold, burn out the pattern, pour in molten metal, and finally clean and polish the cast item. Check where sprues and vents are needed in the pattern. Their position changes where cleanup marks appear.
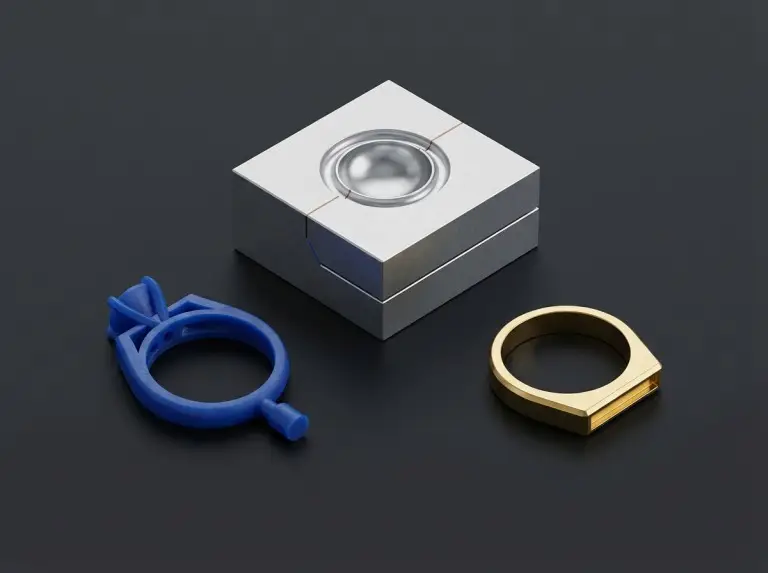
Molds and Repeatable Copies
Adding repeatable wax copies makes it easy to create similar items over and over. Cutting a negative cavity in a tough mold material lets you make lots of copies for collections or set sizes. Draft, venting, and parting must be planned carefully—fix these before you start mold cutting.
Molds are not just for wax. Soft Tooling vs. Hard Tooling is a useful way to choose between faster, lower-cost mold options for short runs and more durable tooling that holds up for higher-volume repeatable copies.You can use them to cast plastics or low-melt materials when you don’t need a high-heat metal pour. In these jobs, the mold surface and parting lines will set the item’s final look—sometimes more than the CAD design does. Confirm how the part will be taken out of the mold before you cut, so you don’t damage visible surfaces.
Direct Machining of Parts
You can use CNC to make metal jewelry parts directly, skipping casting. This works well for things like screw-back hardware, tags, hinges, and certain rings. Go with direct machining only when you have a plan to collect and recycle chips, since material costs can be high.
Direct machining allows for complex shapes that casting can’t easily produce, like fit-together pieces, tight fits, or sharp inside corners. Before you make these, run careful simulations. Even a small crash can ruin the look of a finished face.
Milling, Turning, and Engraving
Modern CNC jewelry making uses more than just a mill.A quick look at CNC Milling History can help explain why these specialized machines and process steps are so important for consistent, high-detail jewelry results. Turning is helpful for round shapes. Rotary engraving adds names or designs at a steady depth. Separate these tasks in planning so the right tool and speed are used for each.
CNC is also used for preparing stone settings. This includes carving small holes or channels for stones. These steps aren’t only decorative—they need to fit stones securely. Always check if there’s enough room for the stone setter to work, so they don’t have to force stones in.
Special steps like gemstone faceting often require their own process and tools. Some jewelers outsource this, but always focus your CNC plan on what’s truly needed for your metal or wax piece.
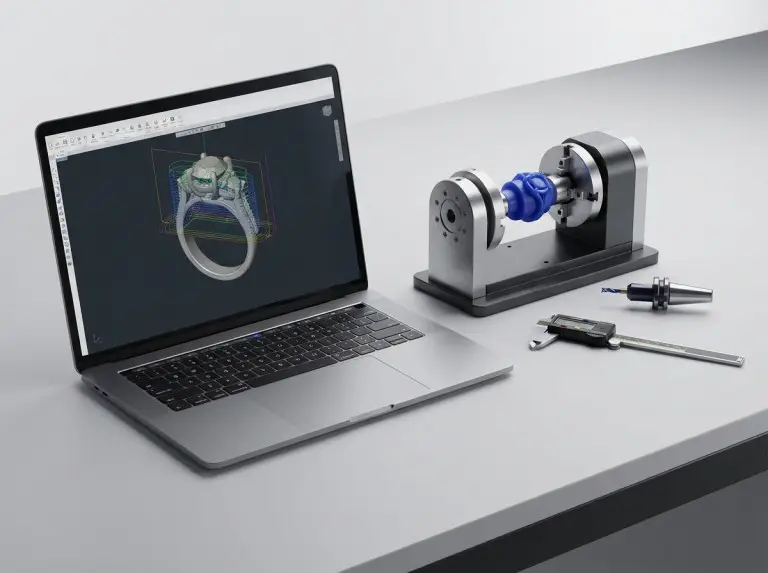
CAD-to-CAM Workflow
A solid jewelry project starts with a good CAD file. Make sure your CAD shows the real part’s shapes, surfaces, and features. CAD is the “hand off” to CAM. If it’s tidy and clear, you avoid time-wasting guesswork.
Many jewelry designs mix flowing curves with rigid needs—like prongs that must be beautiful and strong. Make sure you label which areas are just for looks, and which are key to the function.
Fix measurement or scale mistakes by using standard file formats like STEP. They preserve design details. Always check the scale, ring size, and stone sizes before you choose any machine tools.
Name your tools and steps simply and use revision control so you can repeat work or quickly track down errors. A tool library makes repeats easy and avoids confusion.
Turn shapes into machine steps by picking the right cutter. Don’t expect tiny end mills to carve sharp internal corners. Avoid chatter with short tools for thin walls. Decide which areas to machine close to final size, leaving a bit to finish by hand.
Further Reading:CNC milling code example
Roughing and Finishing
Roughing is about taking away bulk without worrying about looks. Remove most of the extra material with gentle cuts, so the finishing tools have an even job. This avoids the sudden tool pressures that snap small cutters.
Finishing is where you control the surface quality. How you move the tool, the overlap of each pass, and the cutter choice all make a difference. Test small areas first, especially if the piece will be mirrored or have crisp lettering.
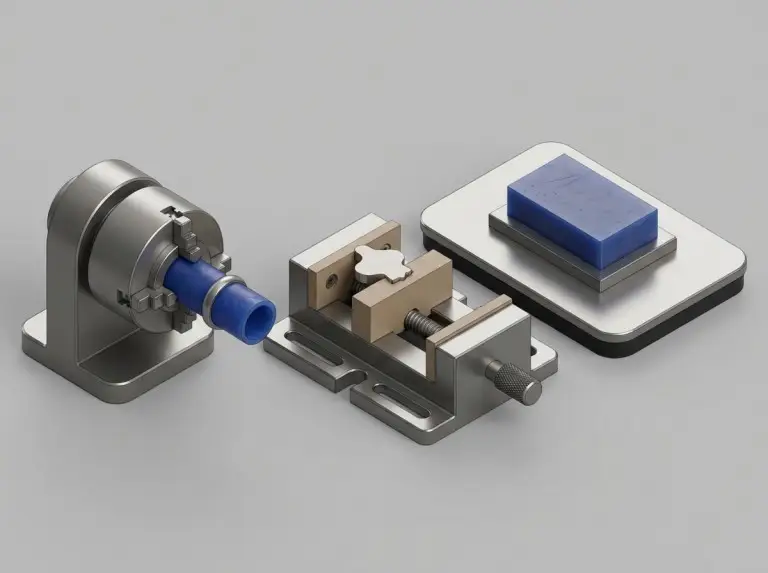
Workholding and Fixture Choices
How you hold your part matters. Rings work best with rotary holders. Flat items do well with tabs and a flat surface. Always check fit in simulation and real life before you start cutting.
Jewelry fixtures look simple, but they must hold tight through vibration and cooling. Choose your method based on the blank:
- Use rotary mandrel for wax tubes or rings.
- Vacuum or glue setup for broad flat waxes when clamps won’t work.
- Soft jaws for multiple metal blanks, ensuring exact placement.
- Tabs or side sprues on hidden faces to keep visible areas clean.
Before running a whole batch, test the first cut. A quick check of depth, center, and engraving saves time and prevents widespread mistakes.
Final Checks Before Cutting
- Double-check the units, scale, and all main sizes.
- Make sure cutter reach and collision risk is checked in simulation.
- Review all thin areas or risky transitions.
- Inspect placement of tabs and sprues for safe release.
- Set up your finished part inspection method.
Machine Setup and Materials
Pick your CNC machine based on the features and how easy it is to hold the part—don’t just choose a machine by size. Check which faces you can reach and if you need to refixture during the process.
Axis Access and Rotation
Three-axis machines work for most simple jewelry pieces. Rotary axes become important for rings and engraved bands. Prevent uneven cuts by keeping the work centered and aligned.
Use multiple axes when you must reach difficult spots, deep sides, or angled faces. Only choose a multi-axis toolpath if it truly makes the job easier and safer.
Machine Styles in Jewelry
Jewelry shops often use more than one machine. Tiny routers are great for wax or plastic. A mill shapes the base, engravers add fine details, and lathes cut rings quickly. Assign each job to the right machine. Don’t make small tools cut too much or too hard.
Separate engraving helps keep main tools sharp. Handle all logos and fine text in one setup designed just for markings, and double-check that text or serial numbers are deep and visible.
Micro-Tool Reliability
Tiny, fragile tools break quickly if not used right. Always clean your tool holders, keep tools as short as possible, and use the correct length flutes. Doing so will protect the part’s surface and avoid ugly scars.
Choose coolant or no coolant based on your material and finish goal. Metals usually need cooling or light oil. For wax or plastics, run dry or use gentle air to avoid messy smears. Keep chips away using air or a vacuum to avoid scratches.
Sharp turns, plunges, or long overhangs are dangerous for small tools. Use light cuts and test in tricky areas to avoid problems.
Wax, Resin, and Pattern Materials
Wax acts very differently than metal. Thin features may wilt from heat. Keep cuts shallow, avoid lingering in one spot, and use cooling for wax. Some jewelers cut wax with water jets to avoid heat. Check the best process on a scrap before a big job.
Resin or plastic patterns also work for some molds. These materials cut well but may melt or chip if tools are dull or if the process gets too hot. Try out a small area first.
Precious Metals
Gold, platinum, and silver add extra cost to every misstep. Plan for chip collection and recycling before you begin. Keeping waste controlled is part of quality and profit.
Soft metals often “smear,” making burrs that can be hard to clean up. Use tools that cut sharply and leave a bit of material for a smooth final pass. Do a test cut first to get settings right.
Tough Alloys and Titanium
Stainless steel or titanium look great and last long, but they’re tough to cut and finish. They get hot, wear down tools, and become harder as you machine them. Select the right cutters and cooling, and check your expected finish before quoting these jobs.
Choose your final polish based on metal. Shiny finishes show small tool marks; brushed or satin hides more, but scratches stand out. Decide finish along with metal so the result matches expectations.
Key Design Rules for Jewelry CNC
Jewelry designed for CNC must fit within what your cutters and finishing steps can handle. Plan all the micro-features around your smallest solid tool and the angles it can reach. This stops “uncut” problem spots from showing up later.
Corners, Curves, and Lettering
Inside corners should be small curves not sharp points, because cutters always leave a rounded edge. These fillets look nice and help stop breakage or stress.
Text and designs should be bold and deep enough to last through polishing. Test small text or logos first to see if they survive your finish process.
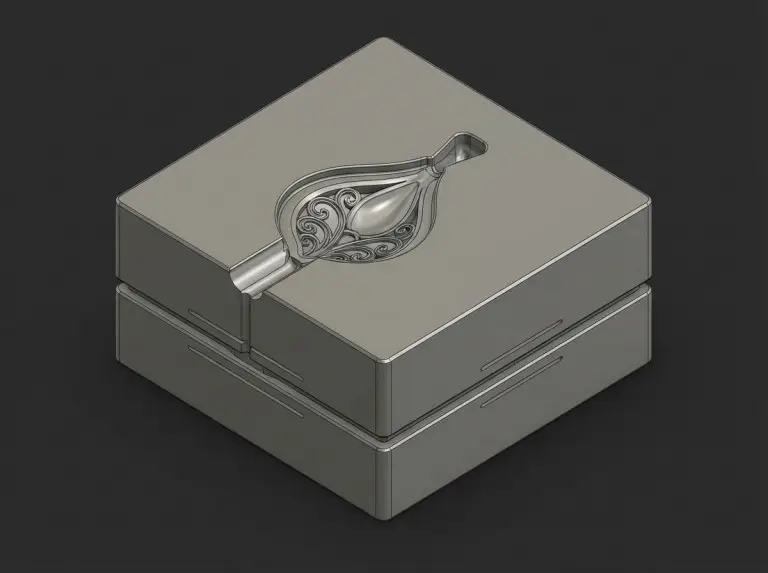
Undercuts and Part Splitting
Many jewelry projects fail because cutters can’t reach “shadow zones.” If access is blocked, redesign for easier cutting, split the part for later assembly, or use a multi-axis approach only when needed.
Splitting a piece into several parts can make casting and finishing much cleaner. If you do this, include clear joints or dowels so it fits perfectly when built.
Wall Thickness and Connections
Know how thick each area should be to avoid snapping or bending. Leave supports hidden inside and a little extra to be finished by hand.
Connect parts with curves or blends, not sharp joins. This spreads out forces and makes hand polish easier.
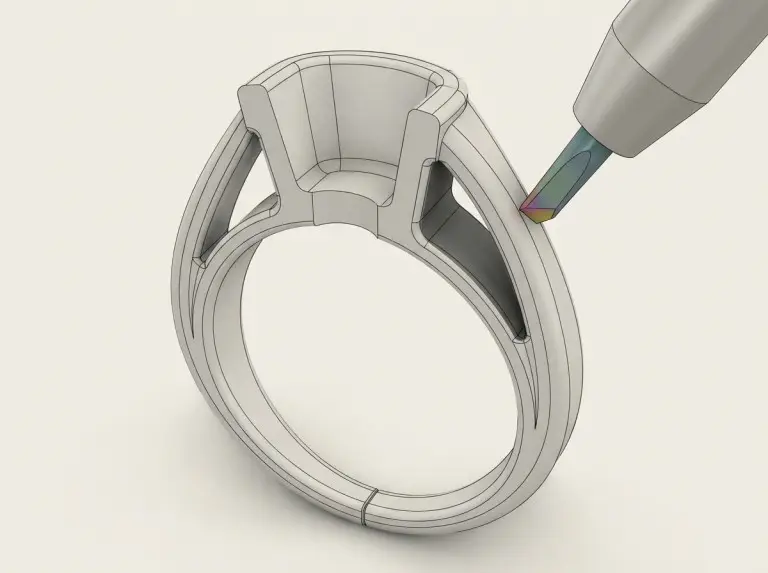
Stone Settings and Micro Features
Stone settings made with CNC are best when seats and holes are exact and easy to measure. Channels and pavés cut this way help stones sit tight and make setting quick. Leave the final touchup for hand work.
Check that tools can reach stone settings—otherwise, even perfect CAD won’t help. Work with your setter’s needs early.
Comfort and Edge Design
Always design comfort into the jewelry, not just at the polishing stage. Blunt edges or hidden sharp points can hurt even if the piece looks great. Keep crisp details where they’re visible, but blend and smooth wherever jewelry touches skin.
Plan texts and patterns to last through your surface finish. Picking the right depth and relief at CAD helps avoid losing them during cleanup.
Casting often changes the size a little—check with casting partners, especially if tolerances are tight. If the piece holds stones, always run a test first.
Quality Control and Finishing
You must check geometry, fit, and style before the final polish. Focus on things like ring size, seat location, and the way each side matches, before edge sharpness is lost to finishing.
Smart Inspection Choices
Pick tools and gauges that match jewelry sizes—simple mandrels and pins often work better than fancy setups. Decide on the smallest set of “must-measure” features to protect what matters most.
Check key signs like whether seats line up and bands are round before starting the polish. It’s much easier to fix these early.
Surface Finish Order
Finishing always changes shape. Plan in advance where polishing or blasting will take away metal and where crisp detail must stay. Test finish on a sample to check if the result matches the design.
Make your intent for satin, gloss, or texture clear so minor flaws don’t ruin the look. Remove burrs and sharp edges as part of your plan, not afterthoughts.
Plating, Coats, and Appearance
Special coatings or plating are often the last step. These need a clean, well-prepped surface, or color and shine will fade or peel. Try a plated test if your design relies on texture or fine detail.
Plating can soften some fine detail or change how sharp corners look. Check early, so no one is surprised by the final results.
Assembly and Packaging
Double-check moving parts, closures, and stone seats before polishing, so repairs don’t ruin the finish. Plan packaging and handling so pieces don’t scratch each other or pick up prints.
Conclusion
At Yonglihao Machinery, we understand that achieving optimal results in CNC jewelry milling requires detailed planning of project scope, process setup, and final finishing. Before starting, it’s crucial to define your goals—whether it’s creating wax models, molds, or directly machining finished metal components. Selecting the most suitable machining method based on design complexity and material costs is equally important. Additionally, validating your plan through simulations, trial cuts, and detailed checks ensures every intricate design is flawlessly executed.
If you’re looking for high-precision, high-quality CNC machining services, Yonglihao Machinery is here to support you. From complex milling processes to jewelry prototyping, our professional team and advanced equipment can meet your needs. Our CNC milling services are built for jewelry-grade tolerances and finishes, whether you need wax patterns, mold components, or direct-machined metal parts.Contact us today to bring your design vision to life!
FAQ
Is CNC better than 3D printing for wax?
CNC wax patterns are often best for sharp edges and detailed castings. Test both CNC and 3D printing on samples to see which fits your needs and cleanup goals.
Should I mill wax or cut the final metal?
Milling wax is safest for custom jewelry and keeps costs in check if anything goes wrong. Go direct to metal when fit, symmetry, or perfect repeat are essential and you can reclaim any chips.
What limits tiny details?
Small cutter size, tool reach, CNC Milling Spindle runout, and how much you leave for finishing are the main limits. Review your CAD for tight spots, test engravings, and run prototypes before a full run.
Are 4-axis or 5-axis machines needed?
Rings and bands usually only need a rotary axis for smooth wraps or engraving. Multi-axis is only needed for hard-to-reach spots. Check this with simulation and collision tools before you start.
How do I keep micro tools from breaking?
Keep tool stick-out very short, use holders in good condition, and start with light cuts. Test the first cut for unwanted vibration or chatter. Always check tool sharpness as it wears fast.
How should I handle precious metal chips?
Collect and label all chips, separate different metals, and track recovery from start to finish. Check with customers about expected returns and plans for refining chips.