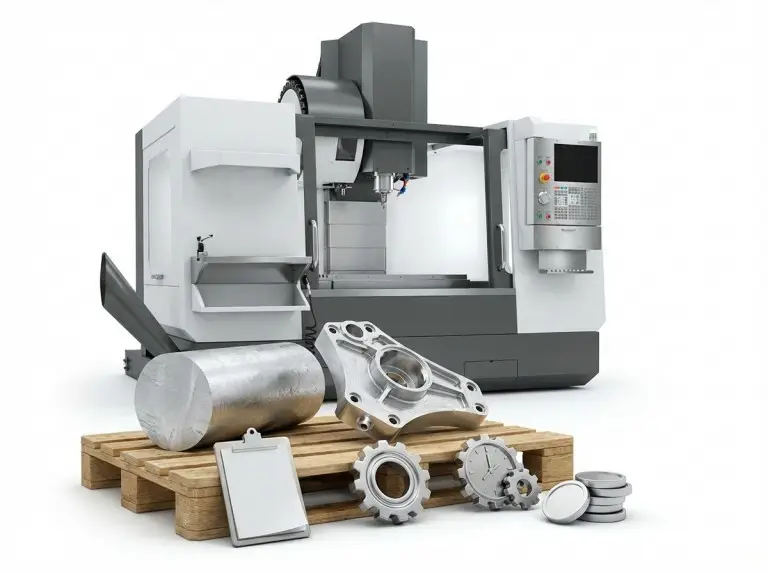

CNC milling for wood produces reliable parts only when you treat wood behavior, cutter geometry, and workholding as one system. Many teams start with the machine and find quality issues later. A better approach starts with the material and finish requirements. Then, you can choose the machine, cutters, and verification steps that match the project’s risk.
At Yonglihao Machinery, we support prototype and production CNC machining for many materials. This includes wood and wood-based sheet goods for clients who need repeatable geometry. We avoid “magic settings” because wood varies and shop setups differ, changing the outcomes. This article will help you decide what to verify so your first successful cut is repeatable.
CNC Milling for Wood Meaning
CNC milling for wood removes material from solid wood and wood-based sheets. It uses CNC-controlled rotary cutters and programmed toolpaths. The term “milling” is used broadly in woodworking. Many shops perform most wood milling operations on CNC routers, not metal-focused CNC mills.
Typical CNC wood milling includes 2D profiling, pocketing, drilling, V-carving, and 3D surfacing. A clear scope matters. The right machine, bit, and dust control depend on whether you are nesting sheets, creating joinery, or doing 3D relief work.
CNC accuracy in wood depends on calibration, workholding, and wood movement, not a single tolerance number. Wood fibers compress, moisture changes dimensions, and thin parts can flex during cutting. A reliable approach is to validate every new material and cutter combination with test cuts.
Misconceptions That Cause Bad CNC Wood Results
CNC wood results often fail when the setup is treated like “press start” automation instead of a controlled process. The first misconception is that machine repeatability creates good edge quality, even with the wrong clamps, spoilboards, or cutters. In reality, toolpath quality and workholding stiffness determine the finish before the spindle even moves.
CNC mills are not automatically better than CNC routers for wood just because mills are rigid. Many wood jobs need large sheet capacity, good chip removal, and high spindle speeds. These are typical strengths of routers. A CNC mill can be a good choice for some hardwood jobs or deep features. However, the decision should be based on project needs, not machine labels.
Feeds and speeds are not a fixed recipe for “wood” as one material. Hardwood density, plywood glue lines, and MDF dust require different risk controls. A safer approach is to start with conservative settings. Then, you can increase them slowly while checking chips, heat, and finish.
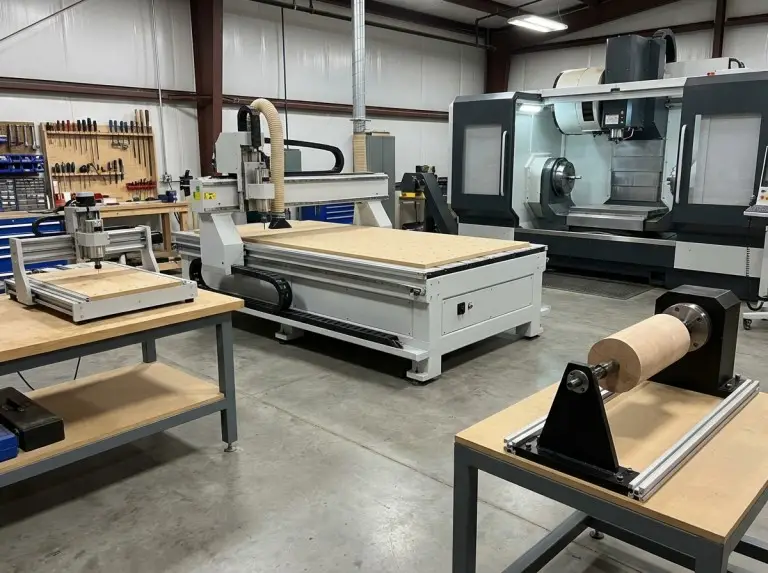
Main Types of CNC Machines for Wood
Choosing a CNC wood machine is easier when you match the machine’s design to the part size, material, and surface quality risk. Routers serve most woodworking needs, while mills can be useful in specific situations.
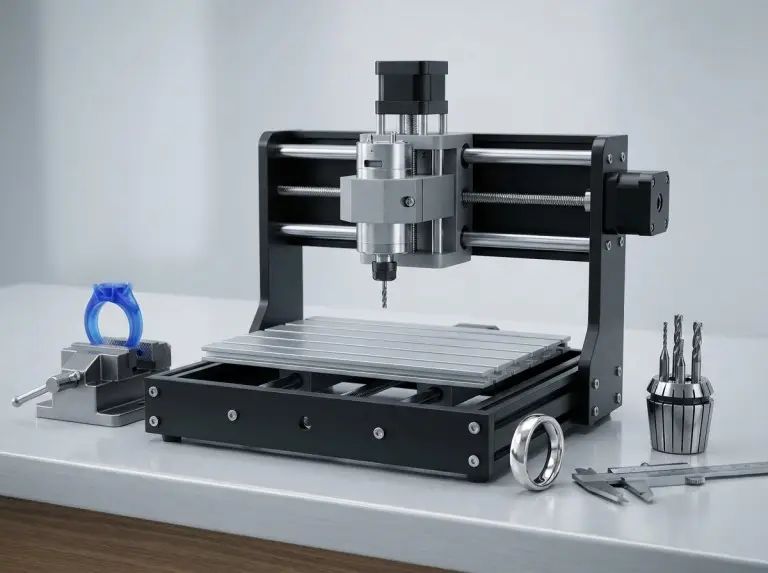
Desktop and Benchtop CNC Routers
Desktop CNC routers are good for prototype fixtures, small signs, inlays, and tuning feeds. These machines are sensitive to vibration, long tools, and aggressive cuts. This makes verification cuts more important than fast cycle times. Hardwoods are possible, but you should validate deeper cuts because machine stiffness varies.
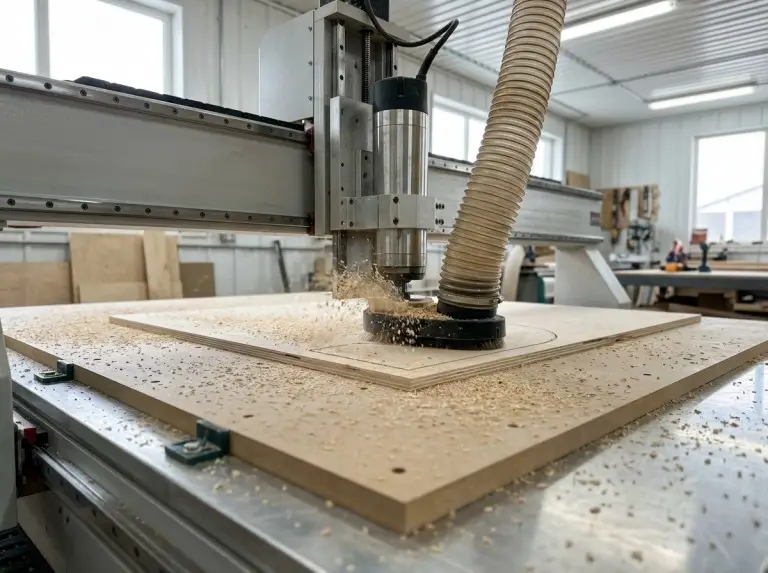
Full-Sheet Gantry CNC Routers
Full-sheet routers handle 4×8 foot sheet workflows, vacuum tables, and production nesting. These machines are best when throughput and part size matter more than maximum rigidity. Plywood quality and hold-down strength are key risks, as voids and lift can ruin edge quality.
3-Axis Machines
3-axis motion covers profiling, pockets, drilling, and most 3D relief work. The main limits are cutter access and holding parts without distortion. A 3-axis setup is also easier to verify. Fewer moving parts mean fewer chances for collisions or hidden mistakes.
4th-Axis Rotary Setups
A 4th-axis is useful when a part must be machined around a cylinder, like a table leg or decorative post. Rotary work adds alignment risk, so teams should plan extra verification steps for runout, centerline, and tool reach. A rotary axis also changes how chips are removed because the cutting angle shifts.
5-Axis or Tilting-Head Systems
5-axis systems can reduce setups for sculpted forms and complex surfaces. The main benefits are better access, finish continuity, and fewer setups, not the ability to “do everything.” 5-axis wood cutting still needs careful collision checks and good workholding because complex motion raises the cost of failure.
CNC Milling Machines for Wood
A CNC milling machine is a good choice for woodworking when the job needs rigidity, deep features, or tight control on smaller parts. The trade-offs are smaller work areas and different dust management needs. The right question is whether the project benefits more from rigidity than from sheet capacity and speed.
|
Decision Variable |
Router-Style CNC |
CNC Mill |
|---|---|---|
|
Sheet goods workflows |
High fit, with vacuum tables |
Low fit, due to table size |
|
Small hardwood parts |
Depends on stiffness |
Often a strong fit |
|
3D carving and relief |
Common fit with ball nose tools |
Fit depends on spindle |
|
Dust collection |
Often designed into workflows |
May require extra planning |
Wood and Sheet Goods Selection
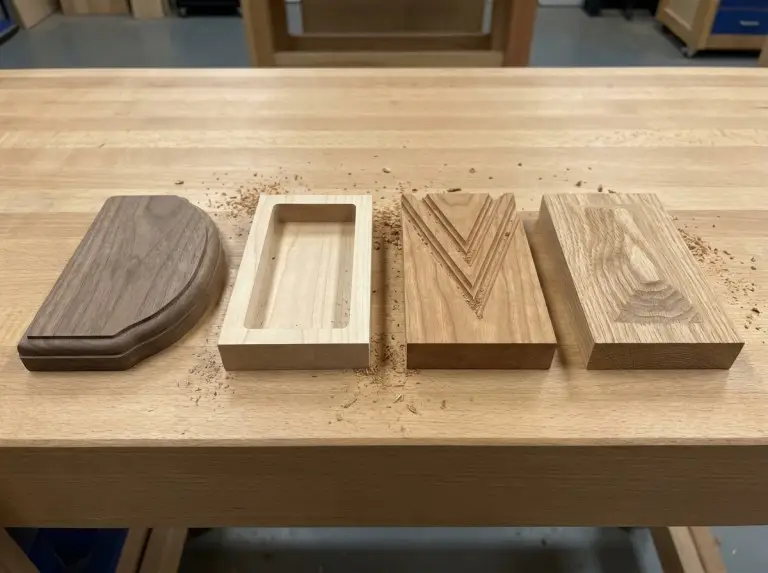
Your choice of wood affects tear-out, burn risk, and stability more than many new users expect. Experts treat wood choice as a machining parameter because density, grain, and glue lines change how cutters behave.
Hardwoods like oak, maple, and cherry can hold crisp detail. But their density can increase cutting forces and vibration. A practical way to manage this is to use less aggressive cuts, run tests, and avoid long tools when the finish is important.
Softwoods like pine, cedar, and fir are usually easier to cut. However, their fiber structure can lead to more fuzzing and crushed edges. Softwoods are great for prototypes and decorative panels, but surface prep often becomes the main task.
Engineered woods like MDF and plywood behave more consistently than solid woods, but they have unique risks. MDF is valued for its uniform density and smooth machining. Plywood quality varies, and voids can damage edges and create rework. Teams should also plan for dust control, as fine dust from these materials can be a problem.
Stock preparation reduces “mystery defects” that seem like parameter problems. Check for flatness, internal stress, and moisture. Warped stock can lift, chatter, or move after the first pass. If stability matters, check the stock’s condition and let it acclimate to the shop.
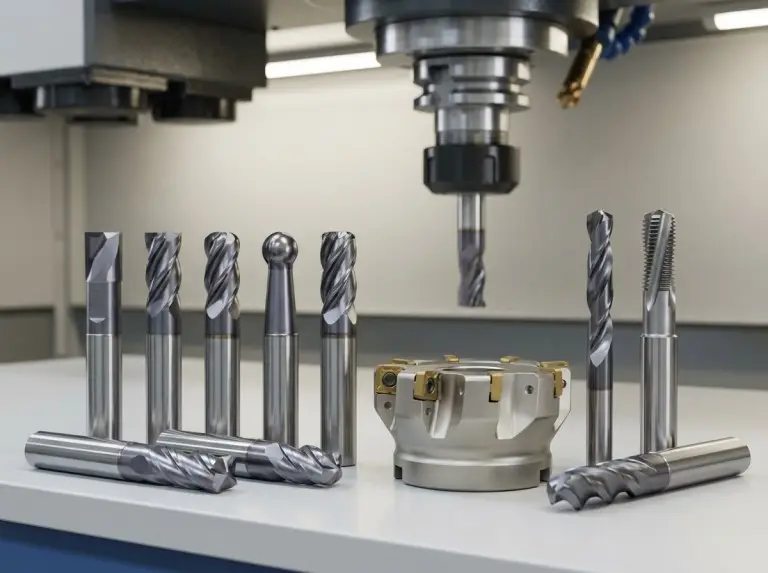
Bit Selection and Toolpath Strategy
Cutter geometry and toolpath choices are the main ways to control tear-out in wood. It is best to match the cutter type to the required face quality. Then, tune the settings with test cuts instead of using generic numbers.
Upcut, downcut, and compression bits solve different edge problems. Upcut tools clear chips well but can splinter top veneers. Downcut tools protect top surfaces but can pack chips. Compression tools balance both effects when the cut depth engages both flute directions.
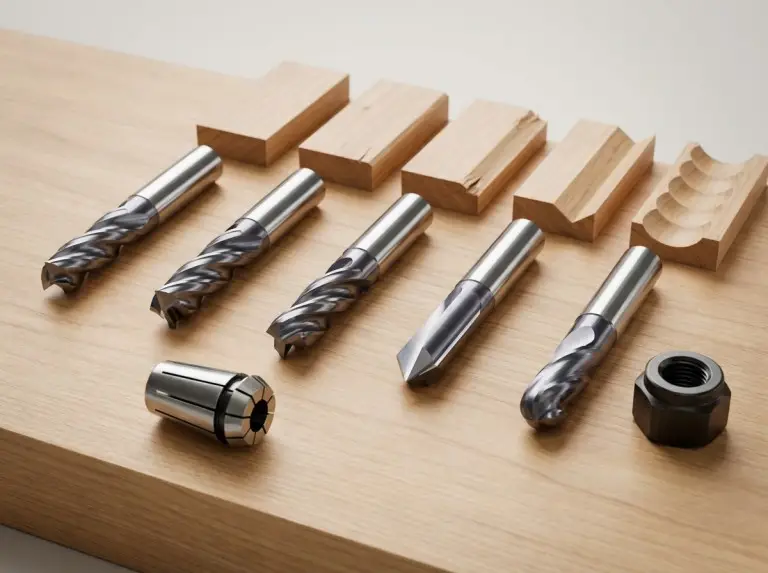
Tool material and sharpness are important, even for wood. Carbide is a common choice for durability. Dull edges are often linked to burning and fuzzing. A good shop rule is to check the tool’s condition when a new wood defect appears before changing the program.
Ramping and helix entries reduce plunge stress. They can improve tool life and finish in dense woods. It is better to use ramps or helices instead of plunging straight down in hardwoods.
Feeds, speeds, and depth of cut should be tuned together, not adjusted randomly. Depth of cut is a key control for tear-out and vibration. It is best to start conservatively and test on scrap material.
|
Goal |
Bit Type That Fits |
What to Verify First |
|---|---|---|
|
Clean top veneer |
Downcut or compression |
Chip packing and heat |
|
Clean bottom edge |
Upcut or compression |
Workholding lift, tab strategy |
|
3D relief, smooth contours |
Ball nose |
Stepover, finishing pass time |
|
Engraving and V-carving |
V-bit |
Depth consistency, Z-zero |
Setup and Verification Checklist
CNC wood milling quality improves fastest when you treat setup verification as a mandatory step. Dry runs, secure workholding, and dust control are basic actions that prevent expensive mistakes.
Workholding should be based on cutting forces and part shape. Mechanical clamps, tape, and vacuum tables can all work. The right choice prevents movement and vibration. Sacrificial spoilboards protect tables, allow for safe cut-throughs, and make vacuum workflows more consistent.
Zeroing should be a controlled procedure, especially when changing tools. Losing the Z-zero is a common failure in CNC wood projects. A small Z error can change engraving depth and ruin a surface finish. Use a repeatable touch-off method and re-verify Z after tool changes.
Dry runs and simulation reduce the costliest errors, like clamp strikes or wrong origins. A dry run is a great way to validate toolpaths before cutting, especially with a new fixture.
Dust collection and personal protective equipment (PPE) are process requirements, not just accessories. Fine dust can affect health, wear out machine parts, and degrade surface finish by getting recut. A dust shoe and good extraction should be part of the setup.
Post-processing should be planned as part of the machining strategy. Decide on tabs, fuzz, and edge break needs before CAM. This ensures the toolpath supports the finishing standard your customer expects.
Verification Checklist Before Cutting
- Confirm wood type and quality match the finish requirement.
- Confirm cutter sharpness and geometry are right for the job.
- Confirm workholding prevents lift and vibration.
- Run a dry run to check origin and clamp clearance.
- Cut a small test piece to tune heat, chips, and edge quality.
Common Defects and What to Verify
|
Symptom |
Likely Driver |
Verification Move |
|---|---|---|
|
Tear-out on top |
Wrong cutter or geometry |
Switch to downcut/compression |
|
Burn marks |
Heat from rubbing |
Check tool sharpness, adjust feed/speed |
|
Fuzzy edges |
Fiber pull, dull edges |
Use a sharp tool, plan finishing pass |
|
Chatter marks |
Vibration, weak hold-down |
Verify clamping, shorten tool stickout |
|
Plywood delamination |
Veneer tear or voids |
Check plywood grade, adjust cutter |
Conclusion
CNC milling for wood becomes predictable when you treat machine selection, wood choice, cutter geometry, and verification as a single process. Better results come from correcting misconceptions early. Then, use checklists and test pieces to confirm your workholding and edge quality before starting.
At Yonglihao Machinery, we provide cnc milling machining service and find that clients get the best outcomes when they define the surface and material first. We then align our toolpaths and verification steps to that risk profile. If your next wood project matters, use this article’s checklist before you cut your best stock. Treat the first clean test piece as the process you can repeat.
FAQ
Can a CNC mill be used for wood?
A CNC mill can be used for wood when the job needs rigidity, small-part control, or deep features. A CNC router is usually better for large panels and high-speed work. The choice depends on part size, dust control, and finish needs.
Which woods are easiest to CNC mill?
Engineered woods like MDF machine very consistently. Softwoods cut easily but may fuzz. Hardwoods hold detail well but increase cutting forces. The best choice depends on the application’s durability and finishing plan.
What bit type reduces plywood tear-out?
Downcut and compression bits are used to protect the top veneer on plywood. Compression tools can help protect both faces. Test cuts are still important because plywood quality varies.
How should I choose feeds and speeds for wood?
Start with conservative guidance from the manufacturer. Then, increase slowly while watching chips, heat, and edge quality. Every shop and machine is different, so test on scrap to reduce risk.
Is dust collection optional for CNC wood milling?
Dust collection is a requirement for consistent quality, machine life, and safety. Fine dust can be recut, contaminate machine parts, and create health risks. A dust shoe and proper extraction should be part of your setup.
What is the fastest way to avoid ruining a workpiece?
A dry run followed by a small test cut is the fastest way to reduce risk. The dry run catches setup errors. The test cut shows how the material will behave. This two-step check is faster than reworking a scrapped part.