
Deciding between soft tooling and hard tooling is easier when you link the choice to production risk rather than generic labels like “prototype” or “mass production.” This article explains how to choose between soft and hard tooling based on a specific part, resin, and production plan.
At Yonglihao Machinery, we see the biggest costs arise when teams lock in a tool before finalizing the design or volume forecast. A smart tooling strategy avoids rework, protects timelines, and ensures your sampling results are actually useful.
This guide compares the two approaches by looking at the factors that truly affect outcomes: tool life, change risk, resin wear, surface finish, and the verification questions that make quotes comparable.
Soft Tooling and Hard Tooling Defined
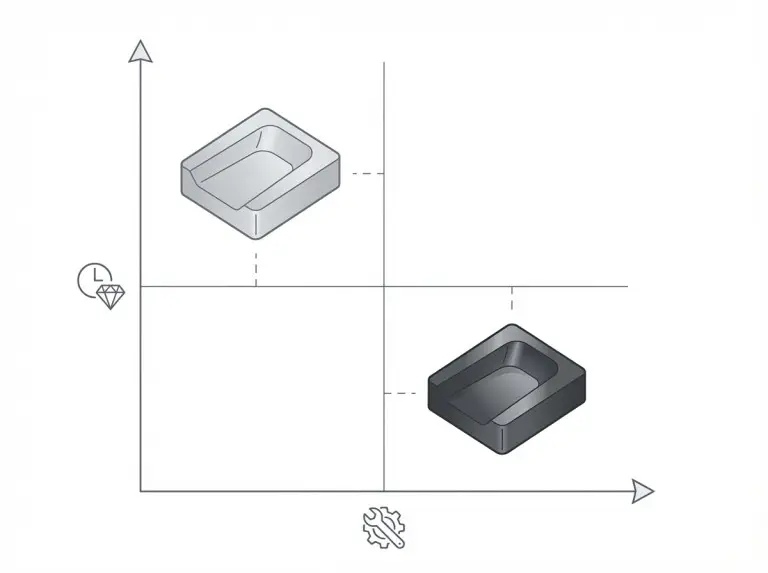
The main difference between soft and hard tooling is how long the tool holds its shape and how difficult design changes are after the first samples. “Soft” and “hard” refer to durability and the rework process, not just the physical feel of the mold.
Soft tooling usually uses materials or processes that are easier to machine with a reliable cnc service. This shortens lead times and lowers upfront effort. The trade-off is faster wear, tighter limits on consistency, and higher sensitivity to resin choice and molding conditions.
Hard tooling is built to keep dimensions and surface quality stable over long production runs. The trade-off is that these tools take longer and cost more to build. Also, late design changes can be slow, risky, and expensive.
Soft tooling
Soft tooling works best when the part design might still change or when you need parts quickly to check fit, assembly, or market interest. It can also support bridge production, supplying limited demand while you prepare a longer-life tool.
The limit isn’t that “soft means low quality.” It means “soft wears faster and changes faster.” If you expect multiple geometry updates, soft tooling often lowers total risk because rework disrupts the process less.
Hard tooling
Hard tooling is best when the design is stable, the process is clear, and you need consistent output for a long run. It is also preferred when parts must maintain tight functional relationships over time, such as mating features, sealing areas, or critical cosmetic surfaces.
However, durability isn’t guaranteed. It depends on resin abrasiveness, gate design, venting, cooling, and maintenance. You must verify these variables before assuming “hard tooling” solves every problem.
Common Misconceptions That Lead to the Wrong Tooling Choice
Decisions often go wrong when teams rely on shortcuts like “only volume matters” or “tool steel always wins.” These shortcuts ignore the variables that actually drive wear, rework, and schedule risk.
Misconception 1: “Volume alone decides the tooling.”
Volume is important, but the reliability of the forecast matters more. If demand might swing widely, locking in a high upfront commitment increases risk, even if the forecast looks optimistic.
Misconception 2: “Tool price is the main number to optimize.”
Tool price is just one part of the cost. Rework, scrap, extra sampling, and downtime can cost more in the long run. A cheap tool that forces repeated sampling loops delays launch and raises the real cost per part.
Misconception 3: “Material name equals outcome.”
Materials like “Aluminum,” “P20,” or “hardened steel” don’t automatically predict life or quality. Performance depends on resin fillers, venting, cooling, surface treatment, and maintenance.
Misconception 4: “Hard tooling is always hard to change.”
Some hard tooling strategies allow for change, such as using insert-based cavities and modular frames. The right question isn’t “can we change it,” but “what is the rework plan and is it safe?”
Main Tooling Approaches in Production Planning
Choosing between soft and hard tooling isn’t just about material; it is a planning choice. Compare approaches by matching them to your expected change rate, resin wear risk, and stability needs.
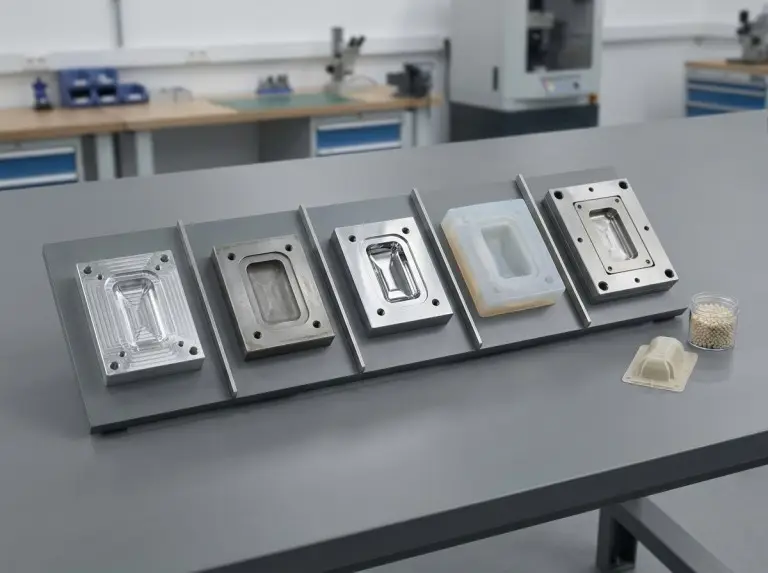
Aluminum tooling
Aluminum tooling is often used for fast cavity machining and quick sampling. Its machinability allows for short iteration cycles. This is valuable when you are still validating ribs, bosses, snap features, or assembly points.
Performance depends on resin choice, pressure, temperature, and how hard you run the tool. Abrasive fillers and aggressive schedules accelerate wear. Verify expected wear drivers before treating aluminum as a “safe default.”
Pre-hardened steel tooling
Pre-hardened steel is a common middle ground. It fits parts needing better durability than aluminum but that may still need adjustments. This path supports more stable dimensions and surface durability while keeping rework easier than fully hardened tools.
The benefit is a balanced risk profile, not a universal fix. Verify which features might change and if you can handle them through inserts or local rework.
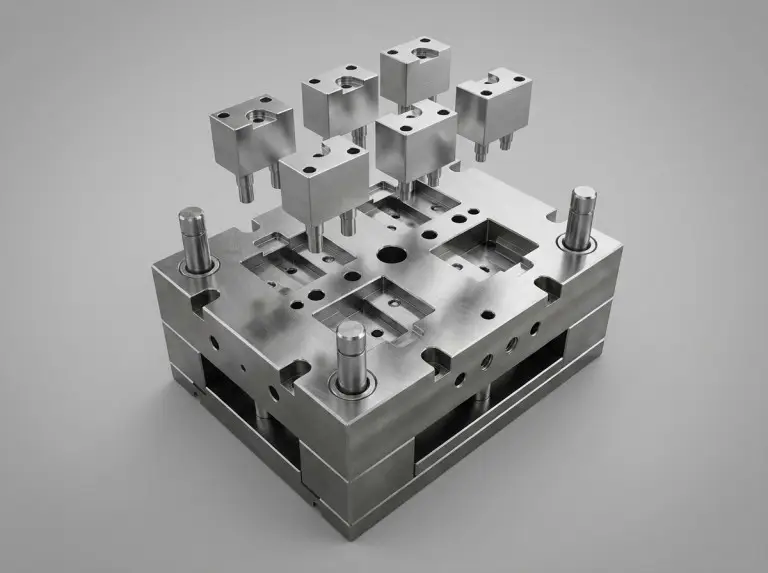
Hardened steel tooling
Select hardened steel when you need repeatable output over long production runs and when the part is sensitive to drift. It is also attractive when you need to optimize cycle times and cooling design for high throughput.
Success depends on details: gate location, venting, cooling layout, and maintenance. A hardened tool built on incomplete information can still become a schedule problem.
Silicone tooling
Silicone tooling is used in vacuum casting for appearance models, functional checks, or small quantities quickly. It helps when you need parts fast without committing to an injection mold.
The limits are clear: silicone molds have short lives. Results depend heavily on the master pattern and process control. Verify if the output is for functional testing, cosmetic review, or investor demos.
Insert-based and modular tooling
Insert-based and modular tooling isolates change-prone geometry. Instead of a solid block, you design the rework path so a feature update doesn’t force a full rebuild.
You can apply this to both soft and hard tooling. Verify what features are isolated, how you align inserts, and how rework affects sampling speed.
|
Tooling approach |
Best-fit decision signal |
Main risk to verify |
|---|---|---|
|
Aluminum tooling |
Fast sampling and likely design changes |
Resin wear and dimensional drift drivers |
|
Pre-hardened steel tooling |
Moderate volume with some change risk |
Rework path and feature stability |
|
Hardened steel tooling |
Long production campaign and repeatability needs |
Cooling/venting feasibility and maintenance plan |
|
Silicone tooling |
Very low volume and fast appearance/fit checks |
Intended use and expected mold life |
|
Insert/modular strategy |
High change risk in specific features |
Insert alignment and controlled rework scope |
Trade-offs That Decide Soft vs. Hard Tooling for a Specific Part
Decisions become reliable when you compare trade-offs specific to your part, resin, and plan. Don’t just “pick a winner.” Pick the route that lowers total risk for your current stage.
Volume forecast and how to verify break-even assumptions
Forecasts are key inputs, but you must verify their confidence level. If demand varies, your strategy should protect against being wrong on either the high or low side.
Validate what drives your forecast: customer commitments, adoption cycles, or ramp plans. Align tooling with your risk posture. For example, start with a fast-turn route and transition once demand is proven.
Design maturity and what to verify before committing to hardened steel
Design maturity isn’t a feeling; it is a list of features that might move. If ribs, wall thickness, draft, or assembly points may change, assume rework is needed.
Before committing to a hardened tool, verify what “frozen” means. Confirm locked dimensions, “steel-safe” areas, and features that need adjustment through inserts or machining allowances.
Resin and filler abrasiveness as a wear driver to verify
Resin selection impacts tooling fast because it affects wear and surface stability. Glass-filled and abrasive formulas accelerate wear. High-temperature resins increase thermal stress.
Verify resin family, filler type, content range, and processing conditions. If resin selection might change after testing, the tooling route should allow for that without a total reset.
Surface finish, dimensional stability, and inspection burden to verify
Surface requirements drive polishing methods, wear sensitivity, and maintenance needs. Some finishes hide wear well, while others show defects quickly.
Dimensional stability affects inspection. If the part requires stable measurement over time, verify critical features, gauge strategy, and how you will detect drift.
Mold features and how they change lead time and rework risk to verify
Side actions, lifters, undercuts, thin features, and complex ejection requirements change lead time and risk. They may limit how easy it is to modify a tool, even with soft materials.
Verify which features need complex mechanisms and if they are essential right now. Teams can often defer complexity until design and demand are proven.
|
Decision variable |
Soft tooling tends to fit when |
Hard tooling tends to fit when |
|---|---|---|
|
Change risk |
Geometry may change and rework is expected |
Geometry is stable and rework should be minimal |
|
Volume certainty |
Demand range is uncertain or ramp timing is unclear |
Demand and ramp plan are stable for a long campaign |
|
Resin wear risk |
Resin is non-abrasive or wear risk is acceptable |
Resin is abrasive/high-demand and stability is critical |
|
Dimensional stability needs |
Short horizon validation is the main goal |
Long-term repeatability and stability are required |
|
Complexity mechanisms |
Mechanisms can be simplified or deferred |
Mechanisms are necessary and must be robust from day one |
Tooling Decision Checklist
Choices become safer when you verify the same inputs across quotes. This prevents scope gaps that cause delays, rework charges, or poor samples later.
Inputs we request for comparable quotes
Provide the CAD model and a drawing that identifies functional datums and critical features. If the drawing isn’t ready, define the key measurement features and inspection approach.
Confirm resin family, filler status, and if resin changes might happen. Share expected annual volume, ramp profile, and the program goal (prototype, bridge, or long-run).
Document finish intent and cosmetic zones. Note assembly interfaces, sealing features, or load-bearing areas that drive gate, ejector, and cooling choices.
What to confirm about inserts, maintenance, and rework paths
Check if change-prone features can use inserts and how alignment is controlled. Ask about expected sampling loops and planned rework methods if results miss targets.
Clarify the maintenance plan: cleaning intervals, wear monitoring, and who owns corrective actions. Maintenance is part of the plan, not an afterthought.
Confirm what “rework” means in the quote. Know what is included, what is excluded, and what triggers a schedule reset before locking the route.
Sampling plan and acceptance criteria to verify early
Define a “good sample” before the first shots. Set acceptance criteria for fit, function, dimensions, and cosmetics so the team agrees on success.
Plan how to validate process stability. If you need repeatability, verify sampling conditions, measurement approach, and how to compare results.
If using bridge production, verify how you will manage output while preparing the next tool phase. This prevents scrambling when early demand arrives.
Conclusion
The choice between soft and hard tooling is most reliable when based on verified inputs. Look at change risk, resin wear, and stability needs for your specific plan. If the design might change or demand is unsure, a fast-turn route with a clear rework path reduces risk. If you need long-term repeatability, a durable route with a maintenance plan protects consistency.
At Yonglihao Machinery, we view tooling as a staged strategy, not just a purchase. Bring the right inputs, verify risk drivers, and align the route with your program phase. This keeps sampling meaningful and stops tooling from becoming a bottleneck.
FAQ
When does soft tooling make sense beyond prototyping?
Soft tooling works beyond prototyping when you expect controlled changes or need to bridge a gap before a long-life tool is ready. It is effective when resin wear risk and stability needs fit the planned run length. If wear risk is uncertain, verify the plan through early sampling.
Can we phase a project from soft tooling to hard tooling?
Yes, many programs phase tooling to reduce risk while demand and design stabilize. Decide the transition trigger in advance, such as verified demand or stabilized geometry. The transition works best when early data informs the hard tool design.
What part features tend to push a project toward hard tooling?
Parts push toward hard tooling when they require long-term stability, repeatable surface quality, or robust mechanisms. Undercuts, complex ejection, and high-output cycles also favor durable tools. Verify which features are truly required now and which can be simplified early on.
What should be verified for abrasive or high-temperature resins?
For abrasive or high-temp resins, explicitly verify wear drivers, processing conditions, and surface durability. Confirm the resin family and likelihood of changes. If the resin choice isn’t stable, ensure your strategy protects against incompatibility.
How do lead time and change requests typically affect the tooling path?
Lead time and change requests impact how you handle rework and sampling loops. A path that cannot absorb change creates schedule risk, even if it looks robust. Verify rework scope in the quote and define acceptance criteria before the first samples.