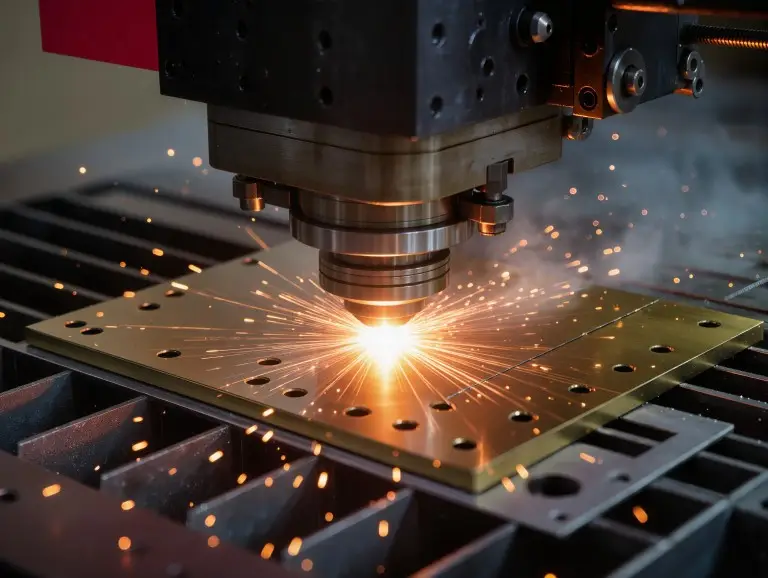

At Yonglihao Machinery, a rapid prototyping company, I support product development from start to finish. Our laser cutting services are one of our core daily processes. Laser engraving often comes next. After a part is cut, customers need durable logos, IDs, or traceability marks. This guide will focus on what laser engraving is, how it works, and how to choose a good approach for your material and mark.
What Is Laser Engraving?
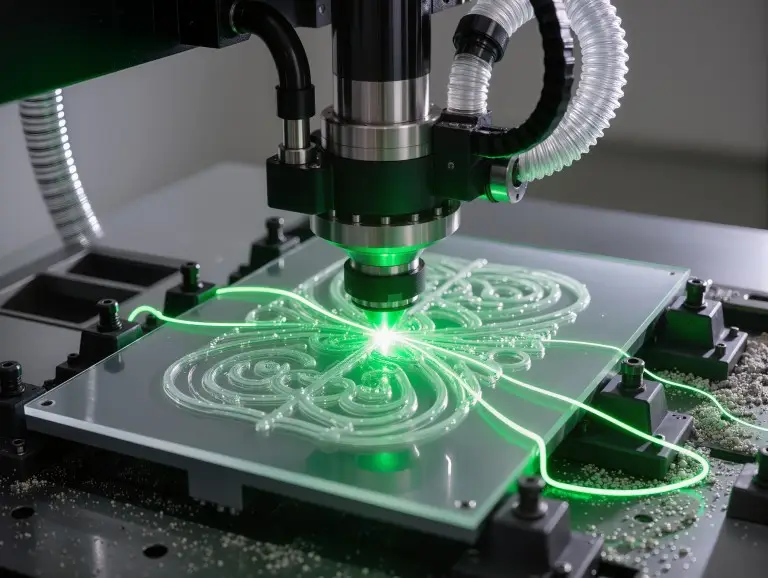
Laser engraving is a non-contact process. It removes material to create a permanent mark with real depth. This physical depth is its main feature. It helps engraved marks survive handling, abrasion, and other steps better than surface-only marks.
Laser engraving is different from laser marking. The main difference is how the mark is formed. Laser marking might use surface color change, oxidation, or light surface changes. Laser engraving uses controlled ablation and material removal. The result is more tactile and durable.
In manufacturing, the main reason to engrave is for traceability. Serial numbers, lot codes, 2D codes, and asset IDs must stay readable. Engraving also works for logos and nameplates. You can use it when you want a mark that will not wipe off, fade, or smear.
How Laser Engraving Works?
Laser engraving focuses energy into a tiny spot. It moves the spot along a path to remove material. A CNC program controls this path. Process parameters control how much material is removed and how the surface looks.
Material removal happens in a few ways. It can be through melting and ejection, vaporization, or short-pulse ablation. Different materials act differently. Some vaporize cleanly. Some melt and re-solidify at the edges. Others, like glass, may get a frosted look from controlled micro-fracturing.
Depth and contrast come from energy density and dwell time. Energy density is mostly affected by the focus (spot size). Dwell time is set by speed and pulse overlap. This is why the “same power” can make very different marks when the focus or speed changes.
Most engraving uses raster or vector motion. Raster engraving fills areas line-by-line, much like a printer. It is often used for filled text, photos, and solid logos. Vector engraving traces lines and curves. It is often faster when the art is mostly outlines.
Main Types of Laser Engraving
This section helps you choose a laser type. Base your choice on your material and the kind of mark you need.
Fiber Laser Engraving
Fiber lasers (around 1064 nm) are a practical choice for engraving metals. Metals absorb their wavelength well. They work well for serial numbers, data matrix codes, and durable part IDs. They are great for stainless steel, aluminum, brass, and many alloys. They also scale well from one-off parts to repeat builds. The process is stable once you control the fixture and focus.
Limits: Reflective metals and heat-sensitive finishes need tighter control. Copper and some aluminum surfaces can be tricky. Their reflectivity and heat conductivity change how energy enters the material. If settings are too strong, you may see heat tint or soft edges. You might also see micro-burr-like rims. When looks matter, first tune for readability. Then, add depth carefully with multiple passes instead of one heavy pass.
CO2 Laser Engraving
CO2 lasers (around 10.6 μm) are best for nonmetals. Many organic materials absorb that wavelength well. They engrave wood, paper, leather, and acrylic with great visual contrast. For signs, gifts, and nameplates on non-metal items, CO2 often gives fast, clean results.
Limits: CO2 is not the first choice for bare metals without special coatings. On wood, contrast comes from controlled burning. So, smoke management affects how clean the mark is. On acrylic, you can get a clear frosted mark. But heat control is important to avoid roughness, especially on thin panels.
Diode Laser Engraving
Diode lasers are compact systems. They can engrave many materials at light-to-moderate levels. They are often used where space and budget are key. They are also used when production demands are not high. They can work on coated metals, some plastics, and wood.
Limits: For deep metal engraving, diodes can be slower. For high-volume industrial marking, they are less forgiving. If you need durable traceability marks on metal, fiber is usually a safer choice. If you mainly engrave nonmetals for strong contrast, CO2 is a common choice for speed.
|
Laser Type |
Best Materials |
Typical Strength |
Typical Limit |
|---|---|---|---|
|
Fiber |
Metals, many alloys |
Durable, high-contrast part ID |
Reflective metals need careful tuning |
|
CO2 |
Wood, acrylic, leather, paper |
Fast visual engraving on nonmetals |
Not ideal for bare metals |
|
Diode |
Mixed, light-duty |
Compact, flexible |
Slower for deep/industrial marks |
What Materials You Can Engrave?
You can engrave many materials. The laser wavelength and energy must match how the surface absorbs heat. For real jobs, I put materials into three groups: engrave easily, engrave with caution, and avoid. This keeps results consistent and the workspace safe.
Common “engraves well” materials include wood, many plastics (non-PVC), leather, and many steels. Anodized aluminum also engraves well. Metals often need a fiber laser for good results. Glass can be engraved, but it acts differently. The “frosted” look may come from micro-fracturing, not clean removal. You must manage stress and the pattern to avoid chipping.
Avoid materials that create harmful byproducts when heated. PVC is a classic example. It can release chlorine-containing gases, which are dangerous to people and equipment. Materials with halogens, certain resins, or some composites can also create bad fumes. When in doubt, confirm the exact material grade before engraving.
How We Choose an Engraving Approach
The fastest way to choose a setup is: material first, then mark requirement, then production speed. If the material is metal and the mark must be durable, fiber is the starting point. If the material is organic or acrylic and you want strong contrast, CO2 is often the simplest way.
Next, define the mark requirement. Think about contrast, depth, size, and location. A logo on a cosmetic surface needs good edge quality and heat control. A serial number for traceability needs to be readable after handling and cleaning.
Then, check your cycle time needs. Short runs can use slower, cleaner settings. Higher volumes need a stable process that works with batch changes and surface condition changes.
Use this before you tune parameters:
- Material and exact grade confirmed (no guessing).
- Mark goal defined: contrast-only or depth.
- Graphic type identified: raster fill or vector lines.
- Fixturing plan set: part cannot shift.
- Safety verified: ventilation and eye protection.
2D Code Readability Basics
For industrial traceability, a 2D code must stay readable after all steps. This means you design for scanning, not just for looks.
The quiet zone is required. Leave a clean margin around the code. This helps the scanner find the edges. If you crowd the code with borders or textures, decoding becomes unstable. Treat the quiet zone as protected space.
Module size must work with your laser spot and surface finish. If modules are too close to the beam’s spot size, corners will round off. Cells can merge, and the code becomes “gray noise” for scanners. If space is tight, it is better to make the code slightly larger than to force tiny modules.
Post-process steps can remove contrast or change the shape. Plan for this. Blasting can soften fine features. Coatings can fill shallow cells. Anodizing can change reflectivity. If the part will be blasted or painted, focus on a shape that survives.
Practical verification rule: Test-scan under the same light and angle your operators will use. If you can, test after the real post-process, not just on the raw part. A small pilot run is usually faster than re-marking a whole batch.
Common Problems and Best Practices
Most engraving failures come from focus errors, unstable fixtures, or too much heat. The symptoms look different on different materials, but the root causes are the same. Fix the basics first.
A best practice is to lock the fixture and focus before you tune for depth. A stable setup is always better than aggressive settings. If results are not even across the part, check flatness, Z-height, and focus first.
Parameter Window Thinking
A stable result comes from a parameter window, not one “best setting.” The mark is driven by the energy delivered per area. This is shaped by spot size (focus) and dwell time (speed + overlap).
Power and speed are a pair. Power raises energy input. Speed controls how long that energy stays on the surface. If you raise power without raising speed, heat builds up. Edges can soften and charring becomes more likely. If you raise speed without more energy, contrast drops.
Frequency changes how pulses stack and how the surface feels heat. Too much overlap can turn crisp removal into reheating. This hurts edge definition. Too little overlap can create dotted lines and uneven texture.
Focus is a hidden multiplier. It changes spot size and energy density right away. A small focus error can widen the spot and reduce peak intensity. This can make the “same settings” act like a different process. If you see uneven results, check your focus and flatness before you touch the power.
|
Symptom |
Likely Cause |
Practical Fix Direction |
|---|---|---|
|
Mark is faint / low contrast |
Defocus, too fast, low energy density |
Refocus, slow slightly, adjust pulse/overlap |
|
Burn marks on wood / acrylic melt |
Heat buildup, slow raster, too much power |
Increase speed, reduce power, add air assist |
|
Rough edges on metal |
Excess energy, poor focus, wrong overlap |
Tune focus, reduce energy, optimize overlap |
|
Chipping on glass |
Too much localized stress |
Reduce energy, change pattern, support surface |
Conclusion
Laser engraving is a controlled process that removes material. It creates permanent, durable marks with real depth. The selection path is simple: match the laser to the material and the motion strategy to the art. Then, stabilize results with focus control and safe extraction. If you use Yonglihao Machinery for laser cutting, engraving is a natural next step. It adds traceability and ID without extra tools for one piece or for repeat builds.
Further Reading: Laser Cutting vs. Laser Engraving
FAQ
Is “laser engrave” the same as laser marking?
No. Engraving removes material and creates depth. Marking may only change the surface. This difference affects durability and how the mark survives wear.
What laser is best for engraving metal parts?
In most cases, a fiber laser is the best starting point for metals. It is efficient, repeatable, and often used for traceability marks.
Can I laser engrave any plastic?
No. Some plastics should be avoided. They can release hazardous fumes. PVC is a well-known example.
Why is my engraving not deep enough even at high power?
The issue is often focus, speed, or overlap—not just power. If the spot is not at the correct focal point, energy spreads out and depth drops.
Does laser engraving affect part tolerances?
It can. Engraving removes material and may add local heat. If the mark is on a critical surface, control the depth. Keep it away from sealing or fit features.