
Laser cutting plastic is easy only when the plastic, laser, and heat match. At Yonglihao Machinery, we are a prototyping manufacturing service company. We mainly provide laser cutting for plastic parts.
In real prototyping, the goal is not just “can it cut.” It is “can it cut cleanly, safely, and repeatedly.” This guide covers material choice, laser type, settings, file prep, safety, and troubleshooting.
What Is Laser Cut Plastic?
Laser cut plastic means the beam cuts fully through a sheet along a path. Laser engraving only removes a shallow surface layer. This creates contrast or texture.
Cutting is controlled by kerf, heat spread, and edge quality. Engraving is controlled by mark contrast, surface melt, and readability.
|
Process Result |
Depth |
Typical Use |
|---|---|---|
|
Laser cutting |
Through the material |
Parts, panels, stencils, profiles |
|
Surface only |
Labels, logos, scale marks |
If you need press-fit slots, cutting is your main challenge. If you need clear marks, engraving is your main challenge.
What Type of Laser Works Best for Plastics ?
For most plastics, a CO₂ laser is the most consistent option for cutting. Many plastics absorb CO₂ wavelengths well, so energy transfers quickly.
Diode lasers can cut some thin, dark plastics. However, results vary by color and thickness. Clear plastics are often difficult because they let blue wavelengths pass through.
Fiber/IR lasers (around 1064 nm) are usually better for engraving plastics than cutting them. For cutting, they often cause melting instead of a clean cut.
|
Laser Type |
Plastic Cutting |
Plastic Engraving |
Typical Boundary |
|---|---|---|---|
|
CO₂ (9.3/10.6 µm) |
Best overall |
Excellent |
Wide plastic compatibility |
|
Diode (blue) |
Limited |
Good on opaque |
Clear plastics are difficult |
|
Fiber / IR (1064 nm) |
Not recommended |
Very good |
Great marks, poor cutting |
Here is a rule we use for quotes: If a customer wants clean edges and speed, we start with CO₂. If the customer mainly wants a mark, we consider a fiber/IR laser.
Main Plastics for Laser Cutting
The best laser cut plastic is one that cuts cleanly and produces safe fumes. Below are the plastics we see most often. We explain what they do well and where they fail.
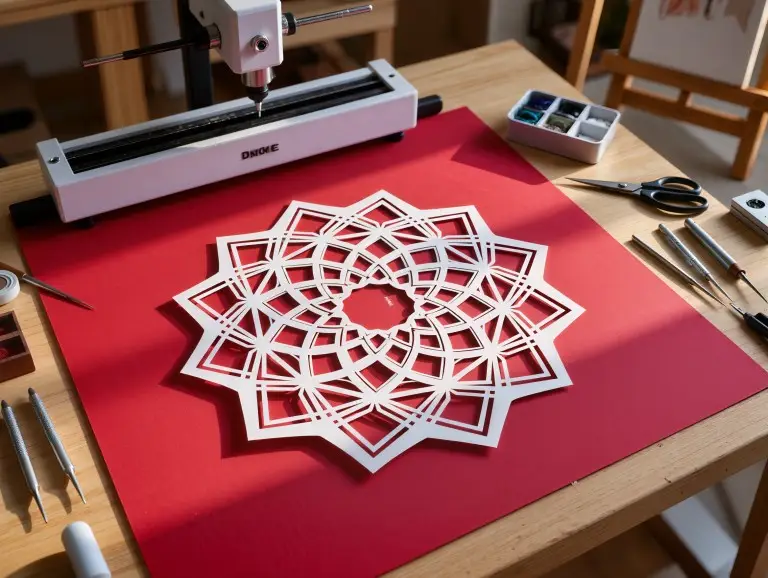
Acrylic (PMMA)
Acrylic (PMMA) is the most common laser cut plastic. It gives clean edges and is great for visual parts. It is used for signs, display panels, covers, light guides, and decorative items.
Acrylic can flare up. This happens more on thicker sheets or with slow cuts. Strong air assist, stable focus, and close watch can reduce this risk.
If your part needs good-looking edges with little finishing, PMMA is usually the first choice. If your part needs high impact strength, PMMA may not be the best option.
Cast vs. Extruded Acrylic
Cast acrylic engraves with a frosted, white look. This is a strong choice when you need good engraving contrast.
Extruded acrylic often cuts cleaner. Its edge can look more like glass. It is often cheaper, but thickness and color options can vary.
Here is a practical tip: choose cast for engraved graphics and extruded for edge clarity. If both matter, test both types with your design.
PET / PETG
PET and PETG are common for clear guards and light-duty panels. They can cut well. However, heat buildup can leave a haze or melted edge.
PETG often needs a “fast, clean, single-pass” approach. Dense, complex features can soak up heat and lose detail.
Polypropylene (PP)
PP is resistant to chemicals. It works well for fixtures and simple plates. It can cut cleanly but may leave a slightly raised edge or burr.
PP is good for functional parts where clarity is not the main goal. It is less ideal for tiny details or close features.
Polyethylene (PE / HDPE)
PE and HDPE are soft and waxy, so they tend to melt and reflow. They can be cut, but you are limited in how much detail you can achieve.
Use higher speed and strong air assist to reduce edge smear. Avoid close parallel cuts. These cuts trap heat and make the kerf wider.
Nylon
Nylon fabric cuts with a lightly fused edge. This edge stops the fabric from fraying. This works well for textiles, filters, and mesh patterns.
Thicker nylon sheets vary a lot by grade and filler. Always test them first, especially if you need tight tolerances.
Polyimide (Kapton)
Polyimide film (Kapton) cuts cleanly in thin sheets for electronics patterns. It allows for precise features with a small heat-affected zone.
Some films show slight carbon buildup on the edge. This is usually easy to manage with proper cleaning and venting.
Mylar (Polyester Film)
Mylar works well for stencils and thin templates. It can hold fine detail. It may have a small burr depending on its thickness.
Keep corner dwell time low to prevent the material from shrinking back. A stable focus and a clean machine bed will improve results.
ABS
ABS can engrave well. However, cutting it can produce heavy fumes and cause warping. Fine features tend to soften and lose their shape.
If you must cut ABS, use strong ventilation and a simple design. For many jobs, engraving ABS is the safer and more valuable process.
Polycarbonate
Polycarbonate is tough, but it often chars or discolors on the cut edge. This is hard to prevent completely with a typical CO₂ laser.
If edge appearance matters, think about using PETG or PMMA instead. If strength matters more than looks, PC might still be a good choice.
Plastics to Avoid
Never laser cut PVC or vinyl-based materials. They can release corrosive gases that contaminate machines.
Foams and unknown plastics can catch fire or produce unsafe smoke. If a material is unknown, identify it first or do not use it.
|
Plastic |
Typical Result |
Best Use |
Main Caution |
|---|---|---|---|
|
Acrylic (PMMA) |
Clean cut, polished-look edge |
Signs, covers, displays |
Flare-ups on thick sheets |
|
PET / PETG |
Good, but heat-sensitive |
Guards, panels |
Haze/melt if overheated |
|
PP |
Clean cut, possible raised edge |
Chemical-resistant plates |
Burr on some grades |
|
PE / HDPE |
Melt-prone |
Simple profiles |
Detail loss, edge melt |
|
Nylon (fabric) |
Sealed edge |
Textile patterns |
Grade-to-grade variation |
|
Kapton |
Precise in thin film |
Electronics |
Minor carbonization |
|
Mylar |
Fine detail |
Stencils |
Burr on thicker film |
|
ABS |
Mixed |
Mostly engraving |
Fumes, warping |
|
Polycarbonate |
Often charred |
Functional only |
Edge discoloration |
Further Reading: Top 7 Laser Cutting Materials
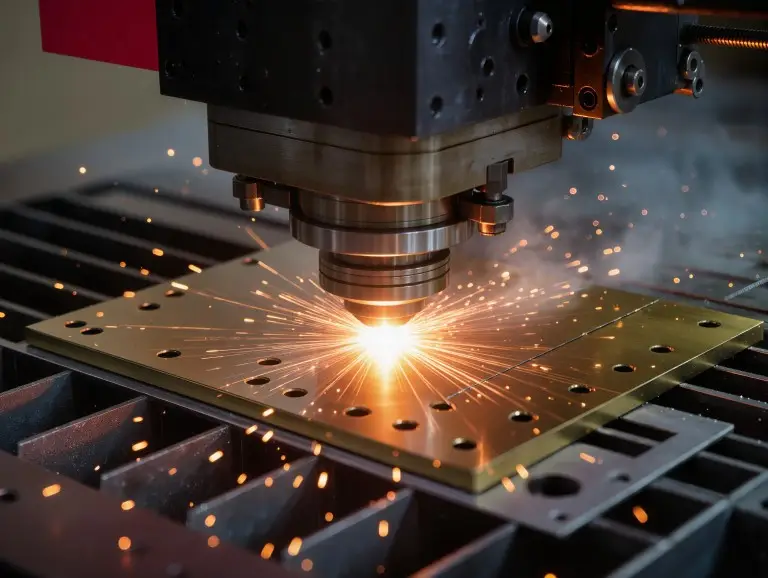
Key Parameters for Clean Edges
Clean edges come from controlling heat per millimeter. Do not just chase maximum power. Your goal is a full cut with minimal heat spread.
Think of your settings as a “parameter window.” Power, speed, PPI/frequency, focus, and air assist must all work together. If you change one, you often must adjust the others.
- Power sets whether you cut, melt, or burn. Too much power creates a melted lip, a wide kerf, and burnt corners.
- Speed sets how long the heat stays in one spot. Slower is not always better. This is especially true for PETG, PE, and thin films.
- PPI/frequency changes how continuous the heating is. Higher PPI can smooth edges, but it can also increase melt risk on soft plastics.
- Focus sets the kerf shape and wall texture. Bad focus causes tapered cuts, rough walls, and incomplete cuts in corners.
- Air assist controls smoke and flare-ups. It also reduces soot on the edge, especially with acrylic.
Our shop method is to run a small test grid. We vary speed and power, then check the edge, kerf, and smoke marks.
A simple tuning order often works. Start fast, then raise the power until it cuts through. Then, adjust PPI and air assist for a clean and smooth edge.
Design, Setup, and Safety Checklist
File quality and safety setup determine the result before the first cut. Good design reduces heat traps and the need for rework.
Design and File Prep
- Use vector paths for cutting. Keep your design nodes clean.
- Avoid very tight spacing between cut lines. Heat will build up and warp parts.
- Plan for kerf if the fit of parts matters. Slots and tabs need extra space.
- Keep tiny holes realistic. Very small features can close up from melting.
Common Formats We Can Process
- DXF, AI, and SVG are typical for vector cutting.
- If you use CAD, export clean outlines at a 1:1 scale.
Bed and Masking
- A flat sheet cuts cleaner than a bowed one. Flatness affects the laser’s focus.
- Use laser-safe transfer tape if you want to avoid smoke marks.
- Do not use vinyl masks or unknown glues.
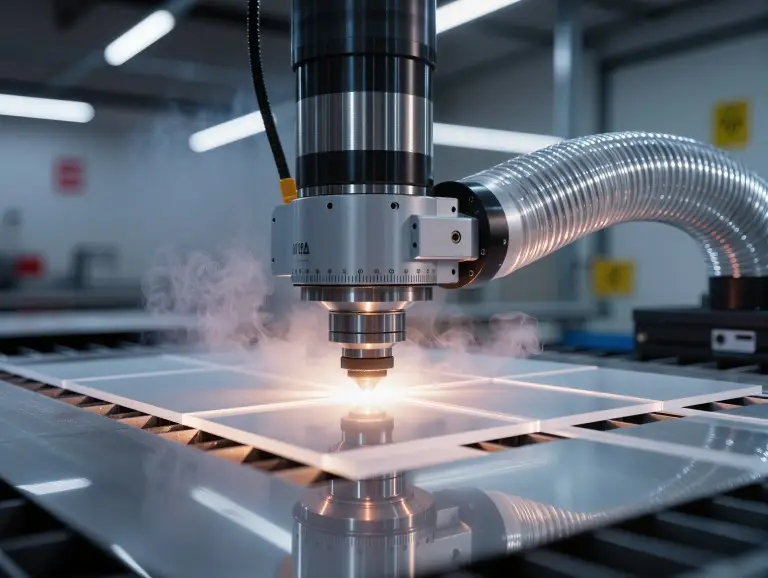
Ventilation and Material Safety
- Use extraction at the source. Plastics can release irritating fumes.
- Never process PVC or vinyl. Corrosive fumes can harm people and machines.
- When a material is new to you, do a small test. Confirm what it is made of.
Fire Control
- Acrylic can flare up. Some foams catch fire quickly.
- Keep a close watch on the machine and have a clear fire response plan.
Troubleshooting Common Issues
Most problems come from heat, airflow, or focus. Use this table to find the first adjustment, then make small changes.
|
Symptom |
Most Likely Cause |
First Adjustments |
|---|---|---|
|
Melting / warping |
Heat input too high |
Increase speed, reduce power, add cool-down gaps |
|
Yellowing / soot |
Poor airflow or dirty optics |
Increase air assist, improve extraction, clean optics |
|
Rough striations |
Focus or speed mismatch |
Re-focus, adjust speed, check for flatness |
|
Rounded corners |
Corner dwell time |
Optimize path, reduce power at corners |
|
Part size off |
Kerf drift / heat distortion |
Use kerf compensation, stabilize settings, reduce heat |
Melting and warping usually mean the beam stayed too long in one area. Increase speed, reduce power, and add space between features in hot spots.
Soot marks often mean airflow is weak or extraction is poor. Improve air assist, clean the optics, and prevent smoke from circulating.
Rounded corners often come from the laser slowing down at corners. The path strategy matters, especially on detailed acrylic and PETG parts.
Size errors usually come from the kerf and heat changes. Use kerf compensation and keep your process settings stable for every batch.
Conclusion
Reliable laser cut plastic comes from a strict process. First, choose a laser-safe plastic. Then, match it with the right laser type. Finally, lock in a stable set of parameters. At Yonglihao Machinery, this is how we keep prototypes consistent.
If you’re looking for high-quality laser cut services, send us your plastic type, thickness, and vector file for a fast quote. We will confirm the safest process and tell you the edge quality you can expect.
FAQ
What is the safest “default” plastic for laser cut parts?
Acrylic (PMMA) is usually the best place to start. It cuts clean, looks good, and is easy to find.
Can a diode laser cut clear acrylic?
Usually not well. Clear acrylic often lets blue light pass through, so cutting is not consistent.
Can a fiber laser cut plastic?
Fiber lasers are generally for engraving, not cutting. Cutting with one often leads to melting and is unstable.
Why do acrylic cuts sometimes flame up?
Flare-ups happen from trapped heat, weak air assist, or slow cutting. Increase air assist, raise the speed, and never leave the machine alone.
What plastics should never be laser cut?
Do not laser cut PVC or vinyl-based plastics. Also avoid unknown plastic blends and many foams unless they are proven to be laser-safe.